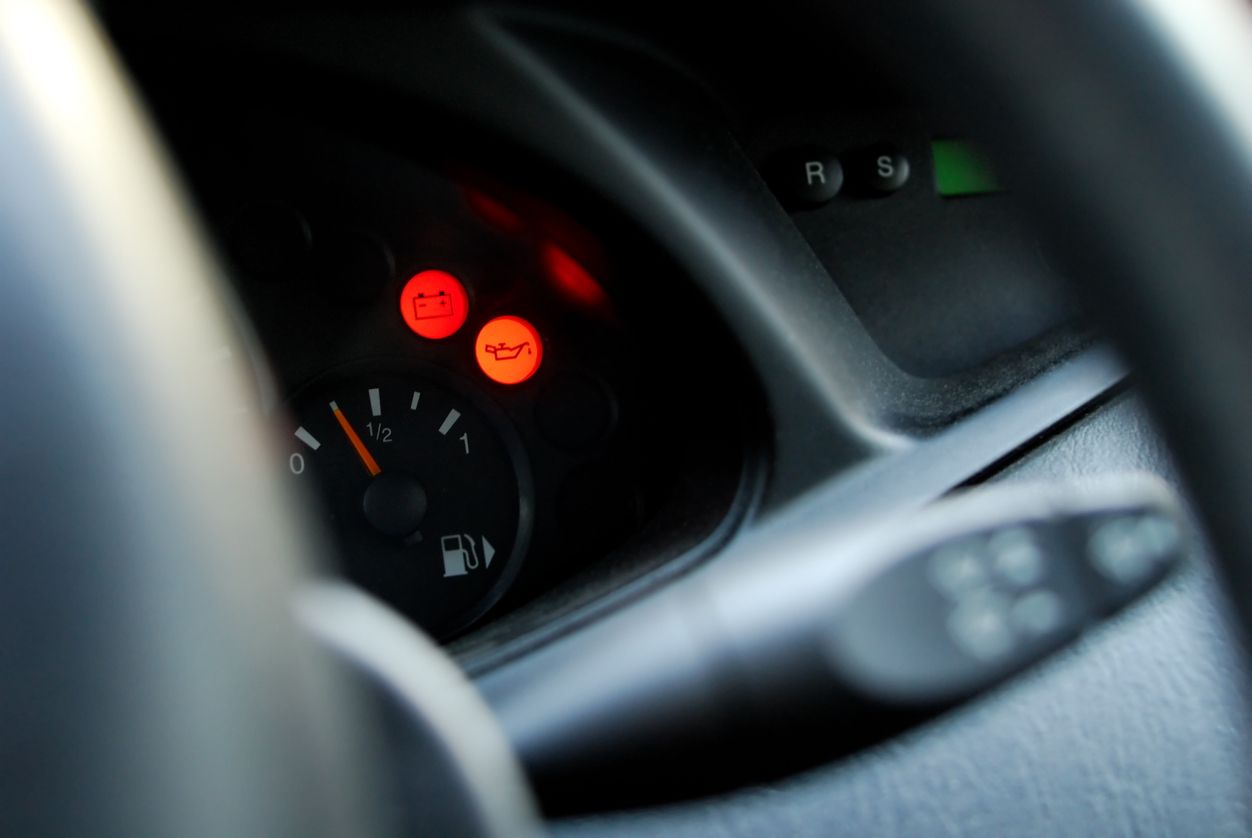
Dashboard warning lights are how your vehicle communicates when it's time for important maintenance or repair. The most common light you’ll see flick on is your oil change or “service oil” light. No need to stress, likely all this light means is you are due for an oil change.
The first step you need to take is clear—change your oil on your own or stop by for a quick and convenient oil change at Tires Plus. And when you bring in your vehicle for service, a technician will reset the oil light for you. Problem solved! But, it’s still helpful to know how to reset this light on your own. So how do you manually reset an oil change light? The reset process all depends on the make and model of your vehicle. Explore our list to find your vehicle and learn how to easily reset your oil change light in a few steps.
HOW TO RESET YOUR OIL CHANGE LIGHT
It’s important to make sure your oil change light is reset after every oil change. Resetting this light helps you stay on track with oil change services, so you don’t get services too frequently or not often enough. In the long run this helps you save on maintenance costs and can extend the longevity of your vehicle’s engine.
Resetting your oil change light only takes a few moments. Depending on how new your vehicle is, the reset process only requires the press of a few buttons. If you cannot find your vehicle instructions below, you can reference your vehicle’s owner manual for specific instructions on how to reset your oil change light.
STEPS FOR 2007 AND NEWER HONDA MODELS
- First, turn your key to the “Accessory” position (one turn of the key).
- Look at the dashboard or steering wheel for a "Select/Reset" button. Press it.\
- With a dashboard knob: continue pressing until "Engine Oil Indicator %" or Engine Oil Life" appears. Using controls on the steering wheel: scroll until "Engine Oil Indicator %" or Engine Oil Life" appears.
- Find and hold the “Select/Reset” button down for ten seconds. Watch for the oil change light to start blinking.
- When it starts blinking, release the button then press it back down for another 10 seconds until it reads 100%
- For some displays you may need to select the “Info” button to enter reset mode.
STEPS FOR MOST TOYOTA MODELS
- First, turn your key to the “On” position (two turns of the key without starting the engine). Make sure the odometer is displaying the current vehicle mileage and not a trip meter.
- Switch off the vehicle. Press and hold the trip meter reset button.
- While holding down the trip meter reset button, turn your key to the “On” position again.
- The odometer should show dashes in the display. Continue to hold the button and wait for the display to change to all zeros. After this your regular odometer reading should appear.
- You can now release the trip meter reset button. Turn off and then turn on your vehicle. The oil change light should no longer be illuminated if properly reset.
STEPS FOR FORD MODELS (WITH SETUP, RESET, AND INFO BUTTONS)
- Find the “Setup” button on the steering wheel and press it until you see an oil reset message. This message will appear on your information display.
- Find the “Reset” button on your steering wheel. Press down and hold the button for two seconds and then release.
- You will know the oil change light is reset when you see an “Oil Life Set To 100%” message in the information display.
STEPS FOR FORD MODELS (WITH MESSAGE CENTER)
- Find the arrow control buttons on your steering wheel. Use the up and down buttons to scroll to “Settings” in your information display.
- From the “Settings” menu select “Vehicle” and then “Oil Life Reset.”
- Press down the “OK” button on your steering wheel. Hold down “OK” to completely reset your oil change light.
STEPS FOR 2006 AND NEWER CHEVROLET AND GMC MODELS
- First, turn your key to the “Accessory” position (which is one turn of the key).
- For older models you will press the “Driver Information” button in the center console until your oil life displays. Then press and hold the checkmark or "OK” button on the center console to reset your oil change light.
- For newer models you may need to use controls on your steering wheel. Go to Driver Information, then scroll until you see the oil life display. Then press and hold the checkmark or "OK” button on the steering wheel to reset your oil change light.
- For vehicles without a display, turn the key to the “Accessory” position, press and release the throttle pedal to the floor 5 times then start the vehicle to reset your oil change light.
STEPS FOR MOST JEEP MODELS
- First, turn your key to the “On” position (which is two turns of the key). Make sure to not start the engine.
- Completely press down the gas pedal three times within ten seconds, then turn off your vehicle.
- Start up the vehicle to check that your oil light has reset.
NEED AN OIL CHANGE? COME TO TIRES PLUS.
By following the correct steps for your vehicle, it is quick and easy to reset your engine oil light. But, sometimes things don’t go to plan. If your light continues to stay on, come give us a visit and let one of our Tire’s Plus professionals walk you through how to reset your vehicle’s oil change light.
When you finally have your oil change light reset, you should be good for miles to come. And when the next time for an oil change rolls around, you can come to Tires Plus for whatever type of engine oil your vehicle needs. Our technicians are here to help you care for your car—without the hassle. Find our best oil change coupons online, then head to your nearest Tires Plus today for service advice and a quick oil change when you need it.